Define the Offer Campaign Audience
The Audience tab of the Offer Campaign Details screen is used to define the available audience of Members who are eligible to receive the Offers in this Campaign. Note that the individual Offers assigned to the Campaign can also be configured with their own eligibility constraints, to provide even more granular control of Member participation.
The platform provides three methods of defining the Offer Campaign audience: All, Simple, and Advanced. These three methods are described below.
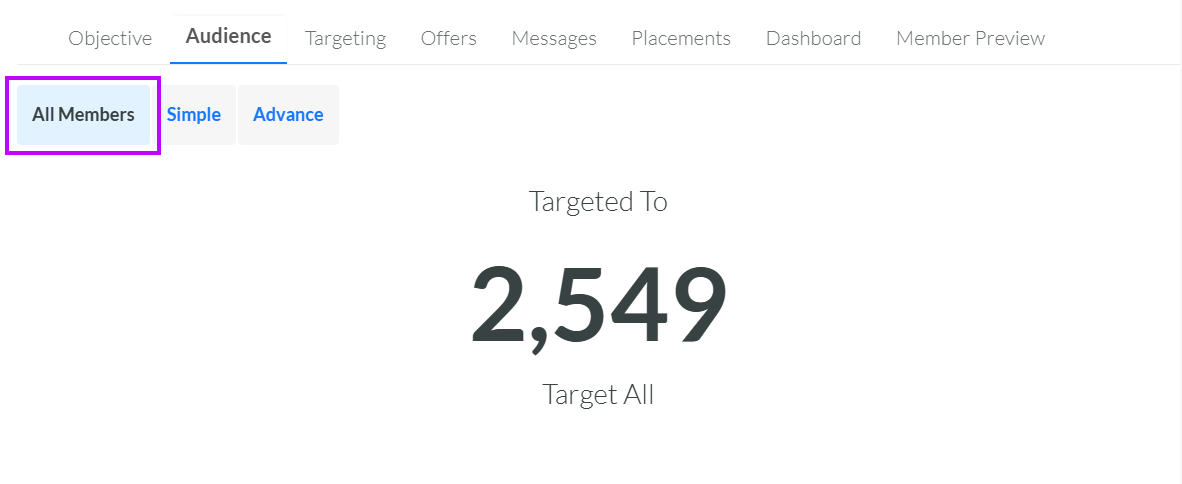
Audience Method: All Members
The platform allows you to use your entire Member table as the audience of the Offer Campaign. To select this method:
-
Select Campaigns from the top navigation bar, then select Campaigns > Campaigns from the side navigation menu. The Offer Campaigns screen is displayed.
-
Search for and select the desired Offer Campaign (see Search for an Offer Campaign for more information on the available search options). The Offer Campaign Details screen is displayed, with the Objective tab selected by default.
-
Select the Audience tab.
-
Select the All Members toggle. The platform generates and displays a count of the Member table.
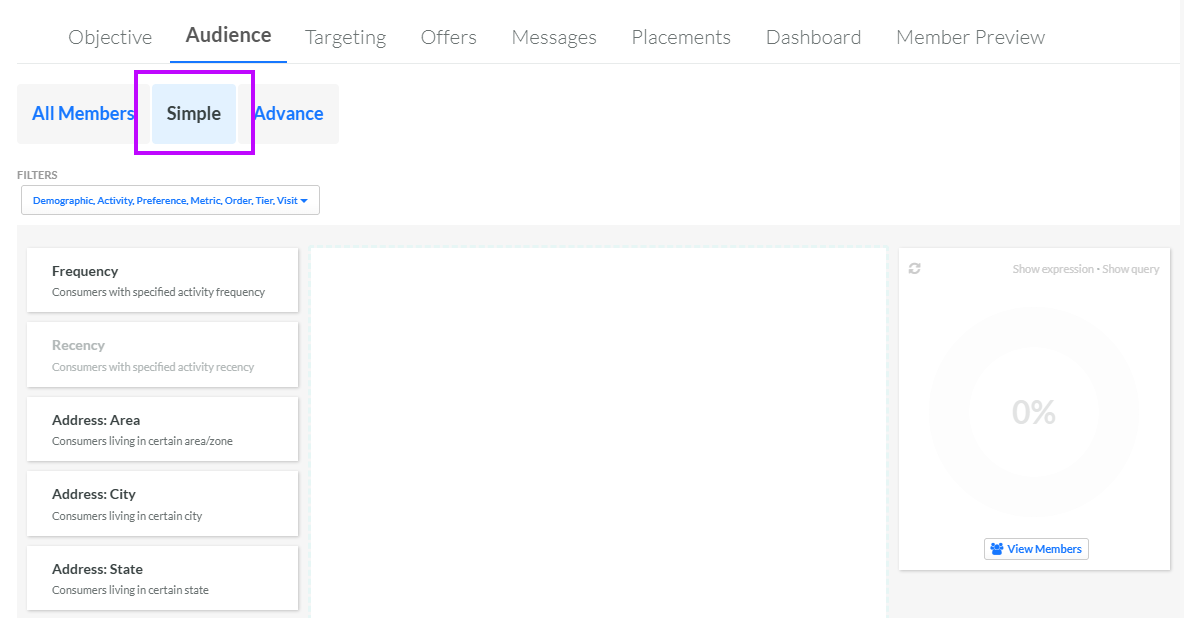
Audience Method: Simple
The Simple audience method provides a drag-and-drop interface for defining logical conditions using a variety of commonly used Member Attributes, such as Activity Frequency, Age, or Metric Balance. Members who meet these logical conditions will be selected for the Offer Campaign audience. To select and configure this method:
-
Select Campaigns from the top navigation bar, then select Campaigns > Campaigns from the side navigation menu. The Offer Campaigns screen is displayed.
-
Search for and select the desired Offer Campaign (see Search for an Offer Campaign for more information on the available search options). The Offer Campaign Details screen is displayed, with the Objective tab selected by default.
-
Select the Audience tab.
-
Select the Simple toggle. Along the left-hand side of the screen, the platform displays a series of commonly used Member Attributes organized into different categories, such as Demographic, Activity, and Preference.
-
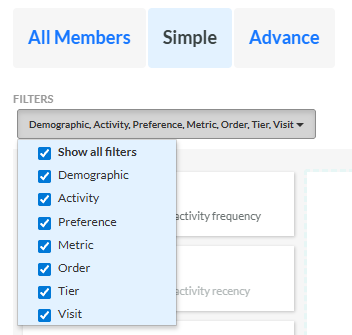
By default, all Member Attributes across all categories are displayed. Optionally, you can hide Attributes in categories that you don't intend to use. To hide a category, click the Filters drop-down menu, and uncheck the desired category. Repeat this step as needed to hide additional categories of Attributes.
-
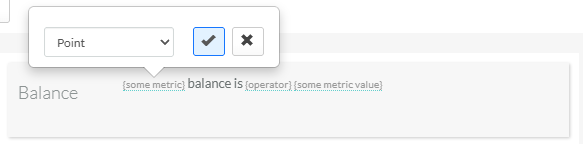
Click-and-drag the desired Member Attribute, and drop it into the workspace in the center of the screen. Options for defining the logical condition are displayed for the selected Attribute. For example, if you drag in "Balance," you will see the phrase "(some Metric) balance is (operator)(some Metric value)."
-
Each option within parentheses allows you to refine the logical condition. Continuing the above example, you can click "some Metric" to display a drop-down menu of all the Metrics defined in your Loyalty account. Select the desired Metric, then click the Check icon. Most Attributes allow you to select a mathematical operator and to enter a value.
-
Repeat the above steps as needed to select additional Attributes and define additional conditions. Multiple conditions are always joined with an AND operator, meaning all conditions must be true for a Member to be selected for this audience. If you need to remove an Attribute, simply drag it out of the central workspace.
-
Optionally, to rearrange the sequence of Attributes, click-and-drag an Attribute using the "handle" icon, and drop it in its desired new location.
-
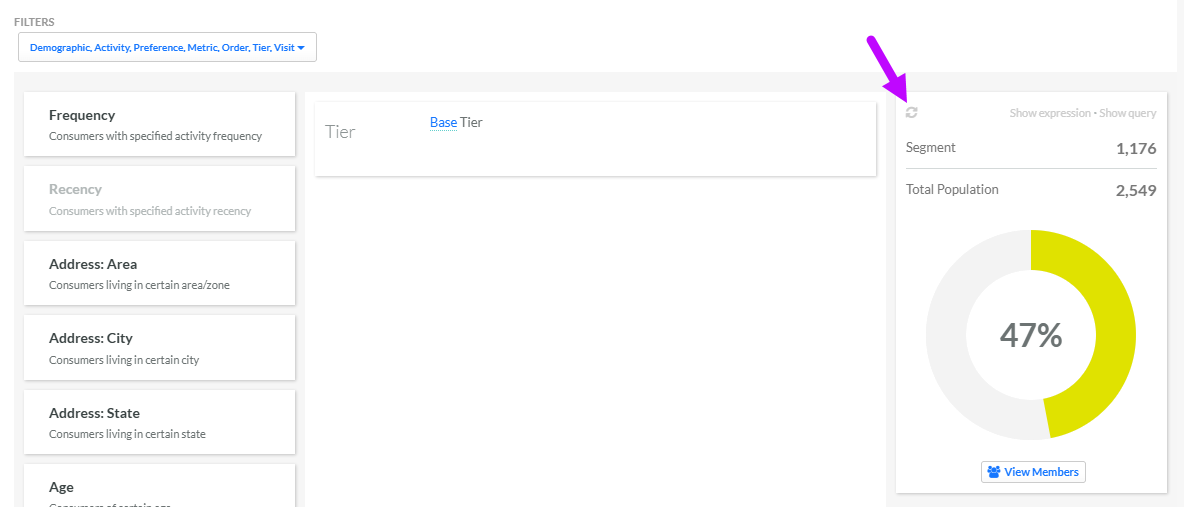
At any time, within the box on the right-hand side of the screen, click the Refresh icon. The platform refreshes the graph to show the count of Members selected by the current audience logic.
-
Optionally, to view the underlying Groovy expression, click Show Expression above the graph. The Groovy Expression pop-up window is displayed and populated. When finished, click Close.
-
Optionally, to view the underlying SQL query, click Show Query above the graph. The Estimate Query pop-up window is displayed and populated. When finished, click Close.
-
Optionally, to download a file containing all of the Members selected in this audience, click View Members beneath the graph.
Audience Method: Advanced
The Advanced audience method allows you to define a Member's eligibility for the Offer Campaign using Segments and / or Places. Segments use logical conditions to define the criteria for inclusion. Places allow you to define geographical locations such as stores, restaurants, or kiosks
To select and configure this method:
-
Select Campaigns from the top navigation bar, then select Campaigns > Campaigns from the side navigation menu. The Offer Campaigns screen is displayed.
-
Search for and select the desired Offer Campaign (see Search for an Offer Campaign for more information on the available search options). The Offer Campaign Details screen is displayed, with the Objective tab selected by default.
-
Select the Audience tab.
-
Select the Advance toggle. The platform displays two sub-sections for defining Member eligibility: Segments and Location.
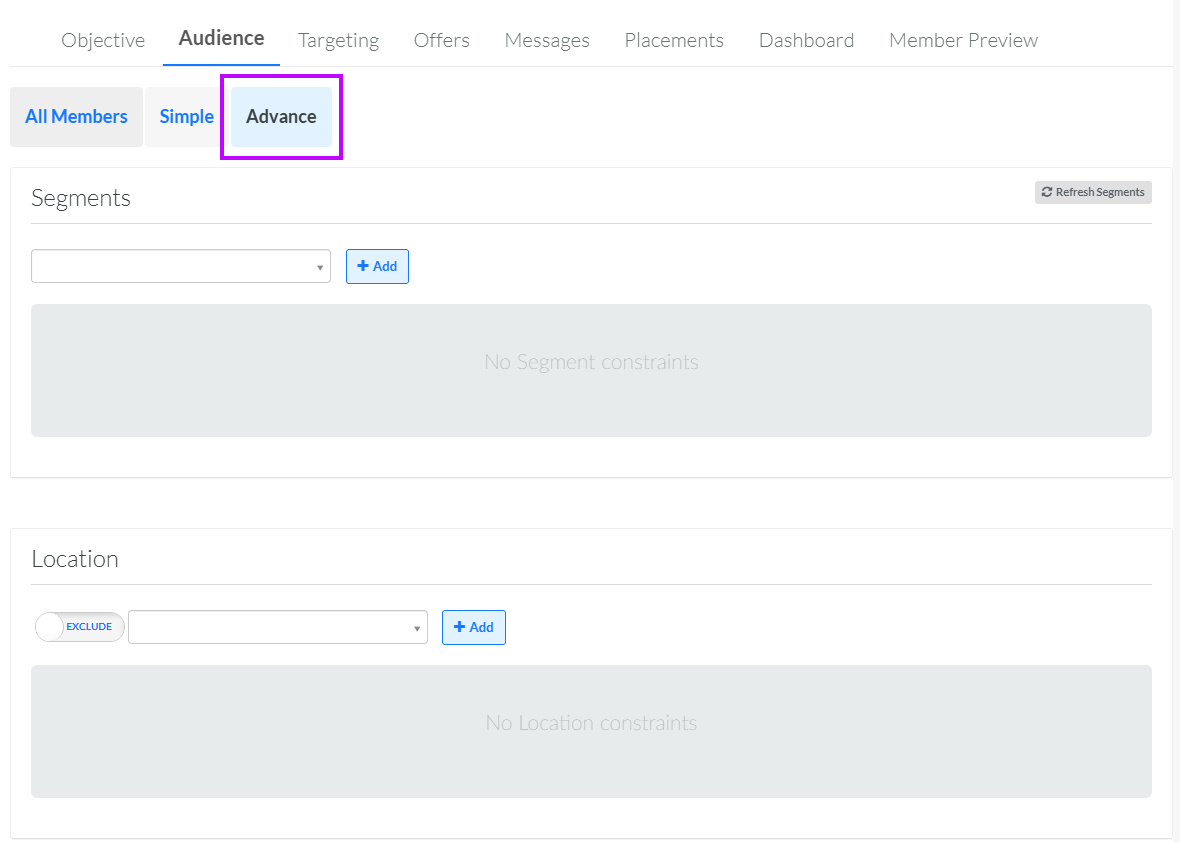
-
Optionally, to target the Offer Campaign to Members based on their inclusion in a Segment, select the desired Segment from the Segments drop-down menu, then click Add. The platform displays the name of the Segment . The Status column displays a green icon if this Segment currently has a status of Published, and a red icon if its status is Draft. The Active column displays a green icon if this Segment is currently active based on its Effectivity Period, and a red icon if the Segment is not currently active. To view additional information, click the Segment's name to navigate to the Segment Details screen.
-
Repeat the above step as needed to select additional Segments. If you add multiple Segments, a Member must be in only one of the selected Segments to be eligible for this Offer Campaign. That is, multiple Segments are joined with an OR operator.
-
Optionally, to remove a Segment, click the Remove icon next to its name.
-
At any point, click Refresh Segments to execute the Segment logic for the selected Segment(s).
-
Optionally, to target the Offer Campaign to Members based on their presence at a Place, first select whether you want to include or exclude the Place. Using the toggle in the Location section, select either Include or Exclude. Including a Place means the Member must use their Offer at that Place, whereas excluding a Place means the Member must NOT use their Offer at that Place.
-
Select the desired Place from the Location drop-down menu, then click Add. The platform displays the name of the Place. The Status column displays a green icon if this Place currently has a status of Published, and a red icon if its status is Draft. The Active column displays a green icon if this Place is currently active based on its Effectivity Period, and a red icon if the Place is not currently active. To view additional information, click the Place's name to navigate to the Place Details screen.
-
Repeat the above step as needed to select additional Places (being sure to select the desired Include or Exclude toggle first). If you add multiple Places, a Member must be at only one of the selected Places to be eligible for this Offer Campaign. That is, multiple Places are joined with an OR operator.